When I left off last time, I had rough cut the slots for the tie bars on the corners of the table top frame. A little chisel work ensured, squaring up the corners:

As you can see, one end is squared up, while the other has a 45˚ return. The shape results from trying to make the tie bar mortise as long as possible without getting too close to the front profiled face.
Once all the mortises were sorted out, I made up the tie bars - here's one prior to insertion in the mortise:

In it goes:

And, the bar now almost all the way in, things are getting a bit tight so I hold off putting it in any further for the time being:

It will be flush to the underside of the frame when fully in place. There's no point in working on that fit for the moment, as I have other fish to fry and the tie bar need more cut out work yet. Here's one more though, showing the frame all together with the tie bars mostly fitted to their mortises:

In other news, the legs have returned from the CNC facility, and I'm very pleased with the results:

Another view:
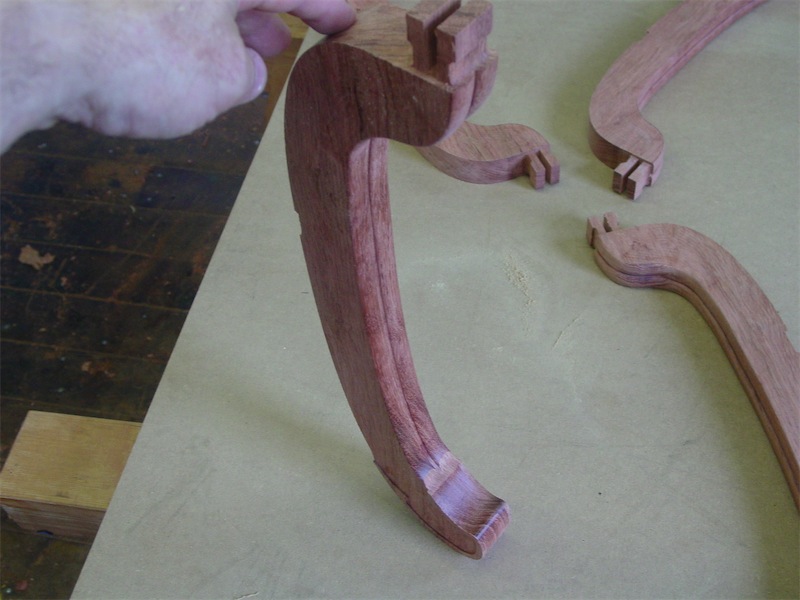
The twin tenons at the top of the leg need some trimming work yet:

Like I aid, the results were excellent overall. I specified the thickness of the leg at 1.2550", and here's how it measured:

The rest of the legs measured within one or two thou of the desired dimension - can't complain about that!
At the bottom of the leg is a counter-bored hole to accommodate the levelers:

And one last shot, showing the lower back surface of the leg:

So, next up on the cut out list of tasks were the shelf frame members which tie to the legs. First step was to process a 1/2" deep notch:

And then there were four all through to the same stage:

Next step was to cut a shallow housing on the top and bottom faces:

Once all four frame pieces were processed through to the preceding step, I completed the cutting, producing a housed cog lap joint:

Not long after, all four pieces were complete:

All that remains on these shelf pieces is to profile the front faces, assemble, trim the locking wedges and finish. I'll save those photos for a later post.
All for today, thanks for coming by the Carpentry Way today. Posting should be more regular this coming week as I will be able to be at the shop working away on this project full time. --> on to post 11
Thanks for these great, clear descriptions of a meticulous job so well achieved. Bravo Chris!
ReplyDeleteVery pleased to read that Lisette - thanks so much!
ReplyDeleteChris, somehow I missed this post. I was wondering how those legs showed up complete in the next post, as if by magic. Maybe CNC is magic.
ReplyDeleteAre those tie bars tapered or wedged in any way? Or is the holding power similar to mortise/tennon joint?
Nice work as usual.
Peace,
Harlan Barnhart
Harlan,
ReplyDeletethanks for the comment. The tie bars are not tapered - just straight.
Any floating tenon/draw bar is not going to be as good as a mortise and tenon, generally speaking. However, in the case of the table frame, if I were to process a tenon on the end of on of the frame members, it would be vulnerable to grain run out problems - breakage I mean. In the case of the connection of the legs to the shelf frame, a draw bar is the best solution I could come up with, especially since it is demountable and therefore leave the piece such that it can be repaired more conveniently down the line if required.
~C