Today I reckoned might be the last day of fitting. It was not, though I'm really, really getting close to that point now. In yesterday's post I had started fitting the can't-make-any-mistakes top panels, and I'll continue on with that process in today's post. A few more pictures than usual today, and I had to cull down from 45 pictures to do it.
Once each of the panels had been fitted to their battens and to the long aprons, I thought I'd get the center rail involved in the fun:

From the other side:

Carefully I tapped along until I had worked it down into place:

That seemed to be looking good, fit-wise, so I disassembled and tried the fit of the central rail to the other table top half assembly. That also went well.
Next, I fitted the two table half-assemblies to one another without the central rail so I could transfer the location of the end cut for one of the table panels:

I used the straightedge to mark the right hand panel from the left one in the above photo.
Next I cut the ends of that long panel in the same fashion as the other one. Then I rebated the edges and trimmed the tongues at the miter tip:

Again, this work on the top panels was a matter of measure 6 times, have a cup of tea, think about it some more, measure again, and...cut once.
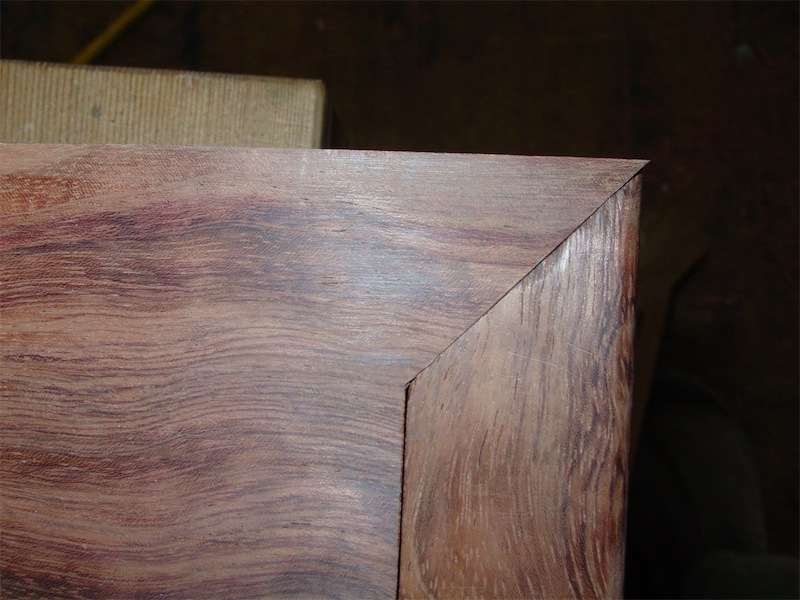
Here's a look at the end of the two panels after the trimming and rebating is complete:

Time to see if/how the entire top assembles. First one apron connects to its table half and associated battens, then on goes the central rail to that assembly, and then other table half with its battens:

Then on with the other long apron:

Then I started putting the short aprons on:

However, the fit got so far and then was a no-go, with a 1/4" gap. I was puzzled for a moment and then realized I had forgotten to finish the miter returns, which need to have a dado cut in them for the mitered returns on the panels. Oops! I was getting a little ahead of myself in my excitement to assemble. Off comes the short apron.
Out comes the marking gauge:

And then is was time for the 6mm chisel to jump into play:

That was followed by the 6mm paring chisel and here's how that looks when all is done:

I followed that up with some additional paring and clean out work on the entire short apron panel dado:

This work proceeds until the 1/4" gauging block fits snugly along the entire groove:

Once the dado work on the short aprons was done, I fitted them up. They went in nicely.
Here's the underside of the table top assembly - a new idea for a wall hanging perhaps?:

Once flipped over, I realized that the gaps between the panels and the raised rib of the central rail were not quite even, so I needed some sort of shim to space them the correct distance. I wasn't coming up with much in my shop, so I went upstairs to the other shop and asked John and Barry what they might have kicking around. Digital calipers in hand, I measured this and that until we happened upon the ideal spacer material: melamine. They had a piece of it which measured exactly 0.0625". I hadn't worked with it before, but it went though the table saw okay, and fitted up to the table quite nicely thank you:

Maybe I should have made the whole table out of melamine?
Given that the shop's humidity has been 70% for the duration of this project, I estimate that the panels are a little wider than they would be if things were really dry. So I have decided to narrow the installed gap between the panel edge and the raised central rib to about 1/16" from the 1/8" originally planned. Ideally, at maximum seasonal humidity, the gap will close completely, and at the driest time of year will open up to as much as 1/8". It will be intriguing to see how it does over the years.
Time to fit those short aprons back on again:

The fits of the mitered returns were just what I was looking for once the short aprons were all the way in:

Another miter:

That one is slightly open on the inside corner, but will close up once the table edge rebate is adjusted near the central rib to allow the middle of the short apron to come all the way tight to its sword tip miter.
And another one, the other end of the one pictured previously:
One set of panel ends then required a little more trimming, as mentioned, of their rebated tongue shoulders - about 1/32" had to come off both panel ends on that end of the table up near the central raised rib, and probably tomorrow I'll shave the mitered returns down a hair as well in the same location. All the miters came out very well I thought, and the adjustments I'm doing are to get the panel spacing off the central rib even from end to end. I'll leave just a slight space on the ends of the panels where they meet the short aprons, just enough to accommodate any seasonal swelling of the short apron.
Once fully fitted up, the panels had some high spots at the edges and in a few places along the raised central rib which needed to come down, in some places by more than 1/32". I could have sharpened up the plane and freshened up the scrapers to do it, but chose a short-cut by using the stroke sander in the adjacent shop to take the material down. I normally eschew sanding, however 15 minutes of work on that machine saved me an estimated three hours of scraping and planing, and at this late stage in the project I was relieved to take that detour, let me tell you.
Here's the table top assembly then, fitted up, with only the long table edge profiling to be done and the finishing work:

Another view:

I think the oil is really going to reveal some beautiful material here really soon.
Tomorrow I'll take care of loose ends, including completing the work on the locking mechanisms for the legs and apron corner joins. Then it will be time, either late tomorrow, or early the next day, for a fiesta of oiling and finishing to commence. That portion of the job I will not post up on, as I want the client, who reads this blog regularly, to get a surprise when I deliver, install, and unwrap the 'present'.
So, post 49 will be the last in this series for about a week, and post 50 will be devoted to the final completion pictures. Don't worry though, as there are other things in the pipeline about which I will be posting. Imagine that, postings on another topic besides this table. Can you handle it? Are you ready? Have you been taking your vitamins? Next post in the series is #49
Coming together very nicely, will you be sleeping well...and your client?
ReplyDeleteThe grain direction in the dovetails on the long side aprons, is that something that you have seen in Chinese work? A lot of delicacy would seem to be required, both when installing and if ever removing the top panels from the aprons, the short grain being weak, the inner corners of the dovetails easily breaking away. Kind of out of your control to some degree, as you point out, being not visible. Separate installed blocks tenoned into the apron, the grain running perpendicular to the panels, might be another approach, albeit requiring an adhesive.
The photo with the assembled top standing on end is nerve-wreaking. It is a little more than impressive that you are able to sling the top around by yourself. It must weigh a ton.
ReplyDeleteCan't wait to see how the table looks once finished. However it looks in your photo's I'm sure will not compare to how it looks in reality. Thanks again for posting this project.
Just one slip-up so far! not bad :-{)
ReplyDeleteI think I get it, the short rail end mitres hold the planks outside long edge against the long rail. The plank is then free to expand and contract into the middle of the table.
It's one solid looking construction, and thats without the holding mechanisims in place!
It is a lesson for me, to watch how you move to the finnished joint in stages, rather than trying to complete it all in one step.
Dennis,
ReplyDeletethanks for your comment. You wrote,
"The grain direction in the dovetails on the long side aprons, is that something that you have seen in Chinese work? "
Yes, it is a feature of the piece upon which this table is based - see post 4 in this series from November 16, 2010.
You're right, the dovetail stubs are a little vulnerable, and I must be most careful with fitting them. I think part of the weakness issue is accentuated by the wood being quite curly in this case. I had tried to source straight-grained bubinga, and had located some, but the seller then wouldn't return my calls when it came time to buy it!
David,
the top assembly has definitely gained some weight with the addition of the top panels, however I can manage to flip it over. It takes two to carry it safely though! Finished photos are about a week away it would appear. I'm looking forward to seeing them too!
Gordon,
yes, you definitely get it in terms of the end miters holding the planks to the outside so they can move at the middle part of the table.
I don't always process joinery work in the same manner - in this case I realized that I had to confirm the overall fit of things before attending to certain details. so some things get left for last that in other situations might have been tackled all at once.
~Chris