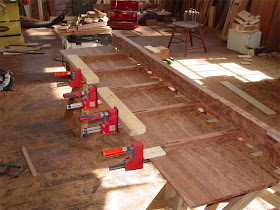
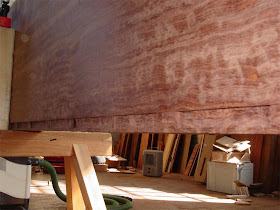
Yesterday I roughed out the slots for the dovetail mortises on the top panels. This morning I completed that stage of the cut out:

The next matter to deal with was finding a way to accurately transfer the locations of the 8 dovetail mortises (on each panel) over to the long aprons so that everything would line up. this was complicated by the rebate along the edge which made it very hard to see the parts come together. I came upon the solution while driving home yesterday - an intermediate piece which would project out of the mortise and over to the apron at each mortise location.
I made up some MDF inserts to fit the dovetail mortises:

A closer look:

Then I assembled the panel with its battens to the apron, to the point at which the MDF inserts met the raised stubs on the rail:

Then I was able to mark across directly:

With all the marking out complete, it was chisel time again along the tops edges of those aprons:

A completed dovetail male stub on the rail:

One down, 15 more to go.
Once I had one side's dovetails cut, I took a break from the chopping and paring to see how things might fit together:

Here's a look along the front edge of the panel just after all the dovetail joints have started coming together:

Another couple of cm closer together, and you can see one of the dovetail mortises on the top panel just about to disappear behind the edge of the apron:

Closer yet:

I took it apart at that stage to inspect the dovetails, just to make sure nothing was getting crushed. It's tough fitting things you can't actually see coming together.
Together again, and drove things further along -the table top edge has now made it to the point of being flush with the upper edge of the apron:
 One of the critical aspects of the fit was that the table top panel edge had to fit tightly against the top edge of the apron- fortunately, that goal was realized as the top panel was moved further into place (the assembly is in an upside-down orientation):
The top panel is sized to be about 1mm fat in width at the front - the protruding bit of panel edge will be trimmed flush to the apron and then rounded over in the not-too-distant future.
Flipped over, here you can see the scene from a little further back, including a little weep in a couple of spots from some camellia oil I used to decrease friction on a couple of dovetail connections:

On to the second panel. First the chopping and paring, and then the transfer of dovetail mortise locations using the MDF inserts:

One point about these sub assemblies is that they confirm that my jig to layout and process the long sliding dovetail mortises for the battens on the top panels were perfectly aligned. Whew!
Once the marks have been transferred and the dovetail tenons cut out, it was time to try the fit:

Here it's most of the way together:

Like the other half of the table, the fit between apron and top panel at the edge was just what I was hoping it would be:

I'll call it a post after exceeding the usual 15 picture limit by more than a couple. I was delighted with the outcome today. This table is going together and everything is fitting well!!
Thanks for coming by. Tomorrow should be a day of assembling the entire top, an event to which I am greatly looking forward. For more, see post 48
I have been continually entertained, inspired, and otherwise amazed at the work you are doing on the table from design rationale to execution. Your devotion to sharing the process is especially remarkable. As a conservator, I have enjoyed the story of the building of this fine piece of furniture - which will eventually become an antique and, dare one suggest, an antiquity - and think of the challenge some furniture conservator will have in the distant future when confronted with this wonderful puzzle.
ReplyDeleteJeff,
ReplyDeletethat's an extremely gracious and generous comment! Funny enough, I've been thinking about how one might communicate with a future conservator about the construction of a piece of furniture - for instance, to let them know that hide glue was used here or there, or that there's a hidden bolt, or that "first you remove piece pin 'a' then piece 'c'", etc. how to do that without placing some sort of sign on the table, that is the question.
I'm glad it is clear to you that I have designed this piece to last a very long time. It's the only way to treat such precious material, that I do believe.
~Chris