Previous installments located in the blog archive to the right of the page - at this point it may appear my blog is all about this table and nothing else, however a dig into the 'label index' further down will lead you into other areas of demented fun.
Last post saw the veritable saga of the levelers completed. This time, it's all about the legs, and like the last post, I must apologize in advance for putting more photos than usual in this thread.
After the shaping work was done, I had the four legs pretty much to shape:

Another view:

They're kinda hard to photograph! How about another look?:

The legs come to rest in the corners of the frame, as this is a corner leg table after all. So, it was time to assemble the aprons together with the central rail for the first time:

Tap! Tap! tap! with a rubber mallet and the aprons come together:

Stepping back to take it all in, le grande panorama - note that the whole assembly is upside-down:

Imagine that, the darned thing actually fits together?!
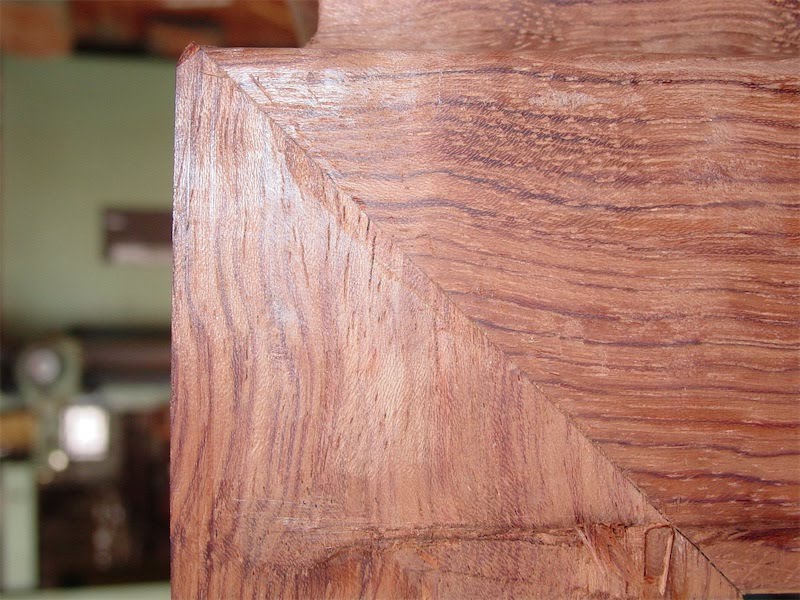
Another close in look at the 3-way mitered rebate, showing the tenons from the aprons just poking through:

Those tenons needs a slight trimming back, so out comes a chisel:

Done:

The slanted mortise is for one of the shachi sen, and isn't completely cleaned out yet. That will wait for a while.
With some slight adjustments to the stub tenons and/or their mortises, one of the legs is offered up to the corner:

A few moments and adjustments later, the leg goes in a bit further:

The fitting process continues:

At this point, the face of the leg hasn't been profiled to match the faces of the apron to which it abuts, however that task is coming on deck quite soon.
A while later, and the leg is at the point where the folded miter stub tenons, mechi, are just about to enter their corresponding slots on the mitered housing:

Those mechi were too fat, so they needed to go on a plane diet:

I decided to chisel the front faces of the leg down to get a better look at the fit of the miters - this one is okay:
The one side was good, while the other needed to come a little closer together, so it was time for a little bit more shoulder plane work:

Of course, once in a while, it is a good idea to look at the situation in terms of squareness:

Things were aligning well, and I was jazzed. It's been months of cutting to finally get to see things come together, and with the sun streaming in the window - you know, I thought it was a pretty fine day.
A little while later, the leg's fit was to the 95% mark, at least - a couple more passes with the shoulder plane should get it there:

I decided at that point it was time to profile the front faces of all the legs before proceeding further.
Actually, I did all that profiling today, and fitted all the legs, however the pictures will be in the next post. Twenty pics are enough for today.
Hope to see you next time then, and thanks for dropping by the Carpentry Way on your travels today. --> on to post 38
Hi Dale,
ReplyDeleteI also tend to revisit the posts, if only to correct the typos I keep coming across! I appreciate your enjoyment of the blog.
~Chris
Their is nothing quite like this! To be allowed to watch in great detail, the intimate secrets of crafting and jointing, in real-time, is indeed a brave step for the craftsman, and a pleasure to the pupil
ReplyDeleteGordon,
ReplyDeleteglad you are enjoying the process and thanks again for your support!
There are of course many exceptional craftspeople out there in the world, however not so many have a significant online presence, for whatever reasons.
I started this blog somewhat by accident - partly because I was fed up with online forums and then a certain Dale Osowski made the suggestion I try blogging. Funny where things can go eh?
~Chris
Hi Chris,
ReplyDeleteI have some questions about this 3-way joint. In the photo were you are trimming back the tenons you added something wet to the end fibers. Do you use alchohol or oil to soften the end fibers? Also in western joinery the tenons are usually a third (or so) the size of the aprons. In this joint the tenons from the legs seem to be very small compared to the bulk of the aprons. Why is this?
Wishing you the best,
John Deerman
John,
ReplyDeleteI use Camellia oil I use to help lubricate end-grain cuts - this has been discussed many times here in the comments, especially in recent weeks.
The 1/3 rule for tenons is a basic rule which is generally fine for simple connections, however in this joint the two stub tenons are merely supporting players in the ensemble. I ask you to look back to earlier posts in this thread - post 3 in particular - you will find more discussion of joinery variations in Chinese 3-way mitered joints. Perhaps you have noticed there is a large slot cut up the inside of the leg on this project? This slot and what fits inside it plays a fairly significant role in the joint. I haven't finished cutting these joints yet, so I ask for your patience and assure you that your question will be answered soon enough by the finished product - I hope. It's coming together soon!
~Chris