Just in case some readers have lost track of what I'm building, or what part I'm working on, or what day it is (I count myself among those who sometimes lose track of such things), I thought I'd post up a few pictures of the original concept, done in SketchUp:

One point I omitted to raise in the previous post concerned the lower frame cross tie, which I had rough cut, jointed and planed about 0.25" oversize a while back. After 2 weeks or so had passed, it was time to bring it down to final dimensions, and I found that the rail had bowed about 1/8" (3 mm) over its length. That is exactly why it is a good idea to let material sit a while after chopping it out my friends. This 1/8" of movement had not occurred at initial cut out, so the movement can only be the result of growth stresses in the tree resolving themselves. Wood movement that occurs at the moment of cut out is more closely associated with drying stresses.
While the growth-related movement is usually fairly minimal in pattern-grade Honduran Mahogany, I like to leave as much time as possible between the primary and secondary milling passes to allow these stresses to work out. It's one of the advantages to taking your time at these early steps, though that time 'luxury' is not always apparently available of course. Then again, time and how longs things should take are entirely value judgments based on what one expects to do in terms of steps and what time one expects those steps to take.
Since I had left ample material in the rail, I was able to joint the bow out of the stick and re-square it up, then get it down to final dimension. It may yet want to move a tiny amount again, but I suspect this will eventually be on the order of 1/32" at most over the length, which I can live with if it does occur.
I thought it was worth making the above explanation in a clear manner, as I suspect that there may be some readers, of a grumpier disposition perhaps, who are wondering why on earth it's taking me so long to make this friggin' screen: 'get 'er dun jimmy! - I can hear it now. Oh yeah,I am all too familiar with that impatient vibe, and must fight against the same tendency in myself at all times. Patience is worth the, uh, time and trouble, when you are building with a view to having the piece you make last as long as possible. With joined construction, that means pieces that fit clean and tight in their connections and aren't going to warp over time. Making a piece to last as long as possible is the most honorable way to treat them material, to give thanks to the tree as it were.
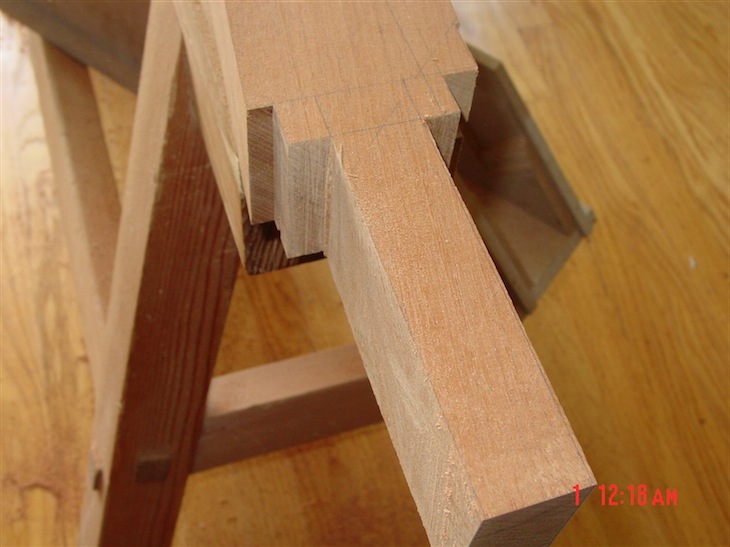
Today I started in on the joints to attach the frame legs to the cross tie and feet:

The configuration is a tenon haunched on both sides. which allows for some torsional resistance in the joint, unlike if one had used a straight square tenon:

The fixing peg will be 0.375" in size, and I have left 1.5x peg size (=0.5625", 9/16") as relish on both sides, which gives a tenon width of 1.25" total.
I'm only going to process two faces of the tenon in this round. First I placed the leg in my jig, described previously, and then faced off one side with the router and a solid carbide spiral bit:

You may notice in the above picture that at the top of the tenon, beyond the shoulder, a surface about 1" long has also been decked off the lower portion of the leg - this is the connection point for the lower frame rail, which will have a small miter trimmed in later. The miter allows me to chamfer the pieces around the joint without the recourse to a mason's miter. I'll describe this in more detail when the time comes.
I repeated the process on the other side, and that gave me a defined tenon root, at 2.375" width:

Then I needed to trim the tenon down below the haunch, which I effected with my 270 mm ryoba, first the rip:

And then the crosscut:

The first tenon is now rough cut to size and configuration:
The two tenons are now rough cut:

On that first tenon, I got a little too close to my line with the saw, so after skimming the surface clean with my router, there remains a few saw scuff marks and the surface there is about 0.02" under size, which I regret:

After skimming both tenon cheeks with my router, I achieved the target dimension for the tenons, plus or minus 0.007" over the surface, measuring at several spots:

Last, here are the two tenons now marked out for the cuts going the other axial direction:

Well, that is it for today. Thanks for coming by the Carpentry Way and I hope you'll stop by again. --> Go to post 11
No comments:
Post a Comment
All comments are moderated. Spamming and comments containing links unrelated to blog content will be deleted.