With the arrival of the shaper in the past weeks, my shop space, about 650 square feet, was starting to get a wee bit cramped. Looking around for ways to use the existing space a little more efficiently, I decided it was time to do something about my wood rack. I had been using an 8' long section of metal pallet racking, which was 4' wide and 6' high. Even with an added-in extra platform I built, I was only making use of about 50% of the volume taken up by the racking. And beside, I didn't much like storing all my wood horizontally, as it seems like every time you want a board it is on the bottom of a pile and the rigamarole of pulling boards off and restacking them was leading me to feel a vertical stacking arrangement, at least for a good portion of my stock, would make more sense.
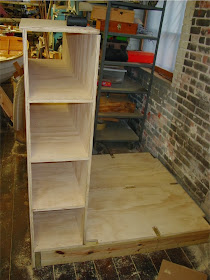
So, I pulled all the wood out of the pallet rack, knocked the rack apart and cleared the floor. Then I spend a little while drawings up a wood rack. This rack is largely made of plywood, and is screwed together. Nothing fancy, but I thought it might be of interest to some so I took a few pictures during the construction.
I started with a 2x6 sill:
Then the 3/4" deck was screwed down:
As you can see, I dadoed the sheet for other sheet goods, and mortised, if I can use such a term, for the studs.
Next in is a second piece of 3/4" ply, which has been dadoes for shelves:
Then the shelves, also 3/4", and assembled to form 12"x12"x48" horizontal boxes:
Another view - the top shelf overhangs to the front, and is dadoes to fit onto the front piece of ply:
Time for a few 2x4 studs, and an upper piece of ply which is 1/2" thick:
A check to be sure things are coming together reasonably well:
Then I fitted in some 1/4" pegboard, which serves as an aeration baffle between both sides, and as a shear panel as well:
This was followed by the remainder of the studs, and the plate. I pushed the assembly back into place, shimmed it level and bolted it to the brickwork with a pair of 2x6 cleats:
Here's a look at the other side:
The next step was to fit some heavy duty racks to the front - these racks I obtained from Lee Valley:
They are heavy duty all right, but it would be nicer if they had pre-drilled holes for fastening them - instead you lag screw through the openings for the support bars.
Rack 'em up:
With this new rack I've economized on floor space by 40% or so compared to the previous 8' long pallet rack, and have been able to store far more material than previously. 'Win-win', I think they call it! I'm planning to hang clamps from the front face of the shelves, along with a few other gizmos - for now it is a convenient place for some left-over plywood. I am still thinking about how to best store the little short offcuts - maybe in 5 gallon buckets?
Now, with the room gained, I may have enough room for a sliding saw - - some day.
Speaking of the machinery, I have completed wiring for the new shaper, and hooked it up to the air supply. It works just fine:
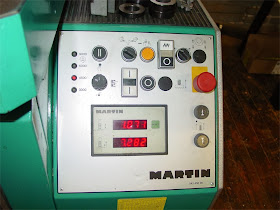
Still learning the ropes with the controls, but I've figured out most of it:
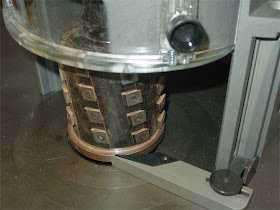
One of the first tasks I will tackle on the T20 will be a bit of templet routing using the Shelix cutterblock and rub bearing:
I took the opportunity to fit the Bowmould Master on top, as this will enable me to have a safer working condition and collect most of the chips:
It's made of cast aluminum and is a nice little unit. I'm glad to have a means of chip collection, as I know all too well what a mess can be made - in a hurry - without such means.
The BowMould Master incorporates a sprung lead-in arm to the rub bearing, which again, aids in safe guiding of the cutting:
I think I goofed with the ductwork - while there is enough room to swing the fence back out off the table, there is not quite enough hose length to reattach the hose from the fence over to the Bowmould Master, so I will need to obtain another bunch of 120mm hose and remount the duct work another couple of feet higher up:
All for now.
I hope my American readers have a pleasant Thanksgiving! Thanks for dropping by the Carpentry Way.


Dear Chris, I think you know how wonderful spindle moulders are or soon will be. I know on amny forums they get a bad rap. Yes they can be dangerous but read many posts from people who had never used them condeming then. say that a router can do the same!.
ReplyDeleteI used many old Martin machines and to me they are the best hands down. i have used any of the latest generation stuff but no doubt it will be impressive. Well done Chris great buy...you will love the things those machiesn can do.
Sinjin.
Chris, reading your comments regarding storage of short length of timber. I had to design a mezzanine floor that spanned a small work shop for the same reason (more floor space). My friend only had 3.6 m ceiling height so at one end on his small shop we built the flooring 1.2m down from the underside of the ceiling over his work bench area giving and area of 7m wides and 4m depth. I used a 4 0ff 100mm SQ steel columns and 2 off 7m ,250 x 75 C section beams to carry the load. Flooring was 19mm structural plywood flooring and using 250 x 75 x 2.5mm Light guage C section purlins @ 300 ctrs.. Designed to carry 5000kg in total. And 34m^3m's.
ReplyDeleteJust an idea
Sinjin