Last time, I left off at the point at which the draw bars and their associated mortises had been prepared:

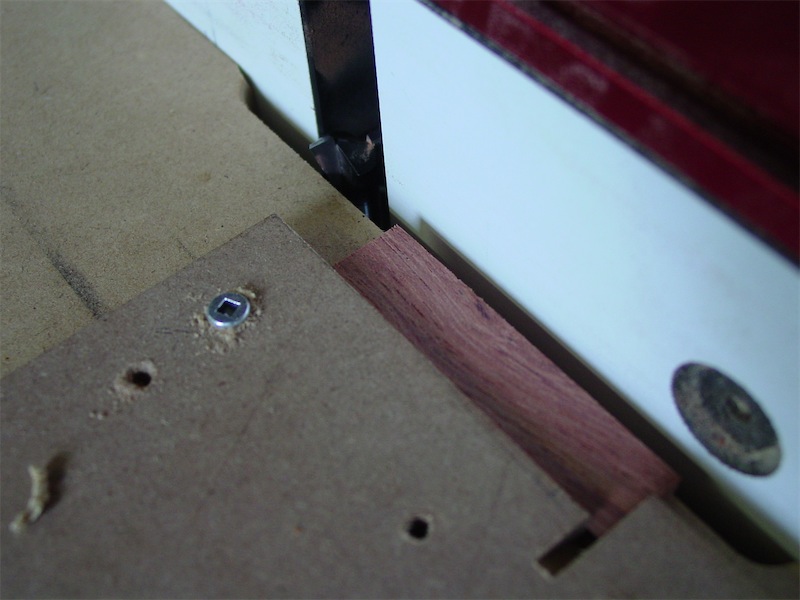
Next on my rapidly dwindling list of tasks to complete were the shachi sen, tapered wedging pins. I prepared some slightly oversize stock for the pins, chopped the pieces to length, and then used a simple jig in my router table with a dovetail bit to process the pins into a parallelogram shape:
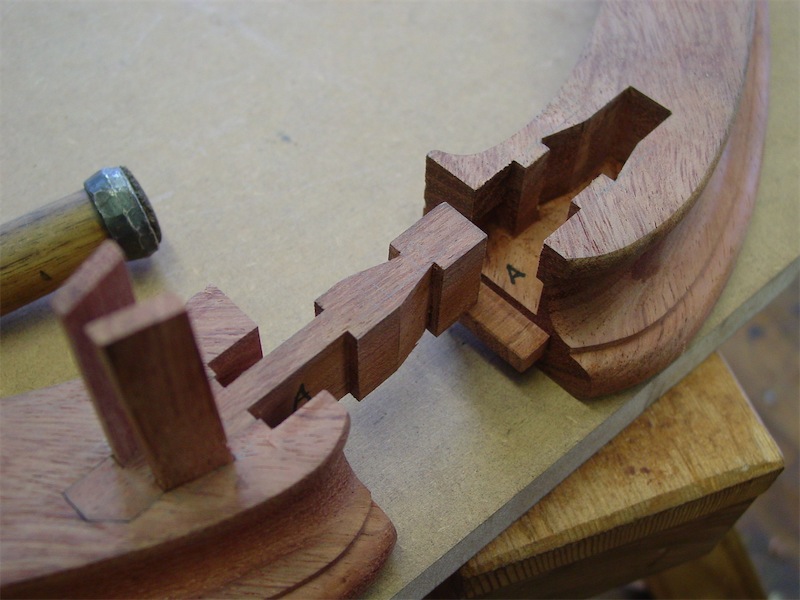
Then it was a matter of fitting the pins one by one, to their trenches, shachi-mizo. Here, I've fitted two pins to one side and am reassembling the connection:
Back together:

In goes a third pin:

And a fourth:

Another view:

The pins are not fully fitted yet - my purpose here is to fit them sufficiently so that the joint could be tightened up and I could work on completing the shaping of the re-entrant corners, which had been left with extra material on them during the CNC stage to prevent tear-out by the cutter.
It just so happens that another woodworker in the building bought a used oscillating spindle sander a couple of weeks back. He cleaned it up and re-painted it, in what I must say was perfect timing in regards to my project needs. That sander looked like a good way to deal with shaping these re-entrant corners, a detail I frequently incorporate. In the past I've used a combination of rasps, files, gouges, scrapers and dragging a piece of sandpaper around a metal pipe to work these areas.
Let's have a go with the oscillating spindle sander, a Grizzly product:

Another view:

I gotta admit, that worked really well. No tear out, and a decently smooth finish. A minor amount of scraping and it will be done:

Here's a look at the topside

Jeez, have I slipped over to the dark side? I now need to get one of those spindle sanders - definitely the best tool for that particular job. Come to think of it, it was an oscillating spindle sander that I witnessed in use shaping bracket blocks at Kongo Gumi, a temple building construction firm I visited in Ōsaka years back. Now I feel a little better.
In time, I had all four corners done, and assembled the entire frame as a unit:

Flipped over, here's a view of what the completed table top frame will look like, sans finish of course:


All for today, thanks for coming by. Your comments are always greatly welcomed. --> on to post 17
Chris, you might consider making yourself a range of nankin kana to shape those curves and leave a very nice surface right off the bat. A tighter radius one would do those shown easily, and no doubt that you would find a myriad of uses for it. I can't recall seeing any shown in your pics. Second only to the smoothing plane in terms of useful hand tools for furniture work, imo. Surprising that a lot of guys into Japanese tools don't use them. Not a carpenter's tool per say, perhaps that is why.
ReplyDeleteHi Dennis,
ReplyDeletegood suggestion. I do have a Lie Neilsen curved base spokeshave, and it would work in this particular case. I usually do much tighter curves on those iri-zumi portions, and haven't found use for that shave in such cases, and therefore haven't generally associated using a shave to the job.
And you're also right that because of my carpenter background, I don't have the diverse array of spokeshaves that many furniture makers might have one hand. I've not had a chance to use a Nankin ganna, but have thought about making/acquiring one more than once.
Thanks for your comment and hope you're keeping well.
~Chris
Heh-heh, that was "many furniture makers might have ON hand", not "...one hand"
ReplyDeleteI am very prone to that particular typo for some reason on/one...
The coffee table top looks like a real nice shape as well, I neglected to mention that.
ReplyDeleteMost kind of you Dennis.
ReplyDeleteI enjoy reading your post here. Your project seems to be successful and the finish product of your work is so great. I can see that you have an art in woods. I think you are also great in timber framing.
ReplyDeleteMaine,
ReplyDeletethat's most generous of you - thanks~
~Chris