I managed to get the carcase together, gluing in the top board with momo-gata joint, and applying a couple of dabs of glue to the lower panel at the sword tip miters. I left in it the clamps overnight, so this was the chaotic-looking scene which greeted me upon arrival at the shop today:

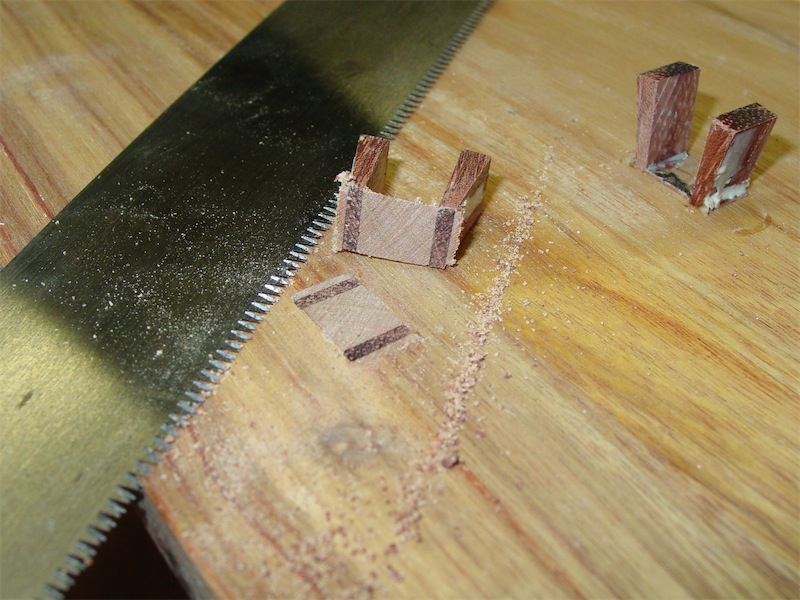
Stripping the various clamps off, I could then turn to the task of putting 96 wedges into the shelf through tenons. I had installed the shelves without adhesive as planned, and intended to put a just a wee blob of glue in with the wedges. The wedges I cut from bubinga, using a small jig and the sliding table saw upstairs. Lotsa back and forth over a 2" travel for those.
Once the wedges were done, I clamped down on either side of the shelf, gave the side of the carcase a whomp with a rubber mallet to make sure the shelves were fully seated, and popped a couple of wedges into the exposed tenon kerfs:

Soon enough, I had one row complete:

A while later, one side of the case was all done:

I then finished the remainder of the wedging on the other side of the carcase and left the glue to set while I sharpened some tools and had some tea. Taylors of Harrowgate Earl Gray - that's my poison.
Once the glue was sufficiently cured, I sawed off the waste with a flush cutting saw, my 'B' grade tool:
The 'A' grade tool is a Miyano, and I tend to let it rest more often than not, as I want it to be my friend for a long time. The sawing didn't take too long, and once I had the carcase sides cleaned off, I gave them a planing to dress the surfaces even more smoothly:

The resulting trimmed off, double-wedged through tenons looked like this:

A closer look at one pair:

As you can see, the wedges on the left have slightly drifted to one side, but I'm okay with that for this project. It's only the odd one that came out like that. I will give the boards another pas with the plane before putting any finish on. I'm planning to use clear shellac.
Here's a few photos then of the top end of the carcase, to see how the momo-gata joint with mitered corners came out:

Another view:

Here's the case standing up for the first time, an aerial view of sorts:

A view from the side:

Next up in this project is the frame and panel back, which will be all in bubinga. The material is cut and dimensioned, all ready to go. You might have noticed that as I have already glued up the carcase, the conventional means of attaching the back would seem to be limited to screws, and such. Maybe some railway tie spikes slammed in there would be a nice, Gary Knox-Bennett-esque sorta touch?
Have no fear, the frame and panel back will be attaching to the carcase with joinery, using a trick I picked up from my studies of Ming Furniture. Stay tuned for more, and thanks for dropping by today. --> on to post 5
Chris isnt it common on hidden portions of construction ( thinking drawer box bottoms or something like ) for the japanese to use nails. I do have a couple pounds of #3 cut nails from a 1880's house that I've saved if you need something "historic" for this project.
ReplyDeleteJeff,
ReplyDeleteyes, it is common in Japanese furniture to use nails for such things. I find that less than inspiring, moreover, they way they do drawer bottoms really is the pits. As I've said a few times, while the form of Japanese furniture pieces is often marvelous, the constructional systems are not always worthy of emulation.
I'll think about your nail offer. Perhaps the bookcase could go in a 'horror' direction, something like that guy with all the nails in his skull. I could festoon the case with those cut nails, and maybe hose it down to get a nice rusting streaks effect going...
~Chris
Chris, bookcase looks great, but what's up with the Earl Grey? Need something with a bit of substance, try the Yarkshire, lad.
ReplyDeleteRS
RS, what can I say? It's a character defect I guess.
ReplyDelete