My god! How long have I been working on this?! Best not to think about it... ah, it's been a sweet journey so far, and an opportunity to make a table I've been thinking about for many years.
Yesterday was a milestone as the table stood on its own four feet for the first time. Today's task was to fit the Giant's Arm Braces, banwancheng as they are termed in Mandarin. I took a bunch of photos, and I think I'll just post a bunch of photos as well, as no one seems to be complaining, not yet at least, about too many photos.
This morning began with the completion of the simple routing jig I used to cut the tapered sliding dovetails which attach the braces to the central rail of the table. Once the jig was designed and built, I made some test cuts in a piece of bubinga, then made any necessary adjustments, until I produced a dovetail mortise. At first the brace dovetail male just barely enters the mortise:

The fit is then eased a little:

Testing complete - you can see the jig to the left:

Next task was to trim the inside corners of the male dovetails down to the underside of the extended portions:

Here's all four of those done:

The brace, with its rebated locking stub on the bottom, is slid into the slot on the leg:

Then I fitted the leg and brace as a pair, checked the alignment and perpendicularity of the leg, and scribed the location of the dovetail. This location, miraculously, coincided with mathematically-determined layout lines shown in the previous post.
Then it was time to put the new jig to work.
I turned the table on its side and clamped the jig into place. Then, step 1 takes place, guest starring the Porter Cable 310 trim router:

Step 2, the Festool OF 1010 gets a turn:

Next, remove the jig and chisel the dovetail mortise corners square:
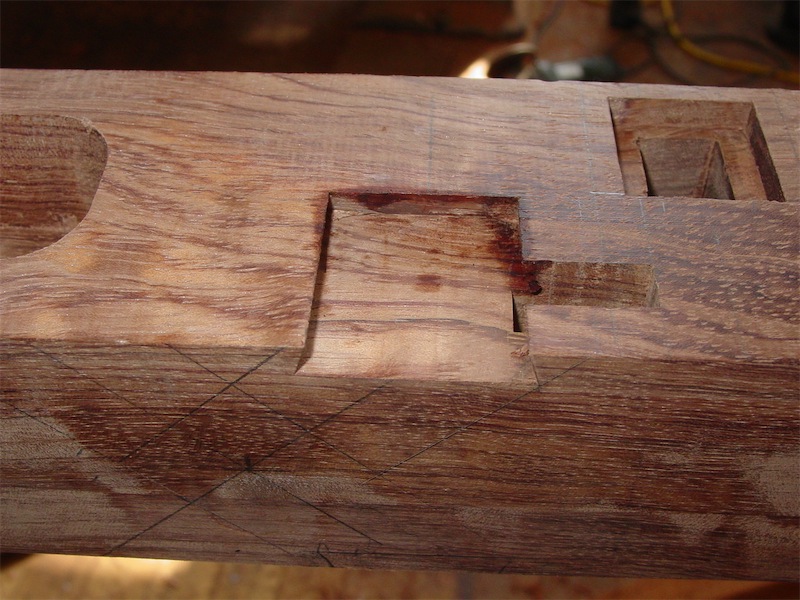
Repeating the process puts dovetail mortises on both side of the central rail:

Another router is brought into play and the shallow housings for the brace tips are cut, followed by some guided chisel work to pare the shoulders clean to the knifed lines. The result:

Time to fit a leg and brace sub-assembly:

It all seemed to be sliding into place without much fuss:

Almost there:

Down and in it goes:

Just a check back to the other end of the brace to see how it looks against the leg:

I would say it seems to be fitting reasonably at least.
Stepping back for a view of the assembly sitting in position at long last:

The banwancheng are fixed in place, in this table, by a technique of cross splining, hiyodori-sen, that I shamelessly pilfer from the repertoire of Japanese timber frame joinery. The mortise is not the easiest to cut as it travels at a compound angle. Here's some chisel work during that process:

With one brace in place, it was time to work on the second. That process went smoothly, and to show for it, I now have both braces snugly in place, their miters abutting one another:

A view from the other direction:

Stepping back to take it all in:

And here's a view through the three mortises for the hiyodori-sen, one mortise in the central rail and a mortise in each brace. The sen will consist of a pair of opposed wedges (one of two ways of doing hiyodori-sen) which expand in the slot when driven against one another, forming a very rigid connection:

I feel that this perhaps novel joinery solution for the attachment of the Giant's Arm braces offers some improvement upon the classic Chinese joinery solution, which involves attaching the upper end of the banwancheng to a table top cross batten with a shoulder abutment, then affixing it simply in place with a bamboo peg. I think my solution for this portion of the table is decidedly stronger than that method, adds considerable lateral rigidity, transfers loads to the central rail (which is itself aligned more efficiently for the load path), plus the braces transfer loading to one another via end grain abutment, and, finally, the whole affair is easily demounted and remounted. I think it will look nice too! I can't help but wonder how many other tables have ever been built employing hiyodori sen? If any readers come across one, please let me know.
I'm not sure what material I'll use to make the hiyodori-sen - possibly bubinga or maybe the ebony.
Here's another angle on the completed assembly at one end of the table:

All for today - more pictures tomorrow, so I hope you'll check in then. I managed to complete all the brace joinery today, but 23 pictures seems like enough for one posting. Thanks so much for coming by today. --> go to post 40
I was wondering how the braces were going to play out design wise, given the scale, and seeing what you have now, they seem to be really adding a beautiful and fanciful element to the under frame....subtle as well. The whole project is looking very tight, a brilliant job. Those braces meeting over the central rail in a miter like that are crazy, man! Your client should feel lucky to be receiving such a fine piece of furniture.
ReplyDelete