Continuing on from last time, I next formed the dovetailed draw bars for the batten-apron connections into their '+'-shaped cross-sections:

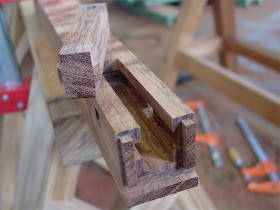
Here's a shot of the draw bar - yatoi sen - insertion end facing you, with its corresponding mortise in the batten below:

The fitting went well and fairly quickly:

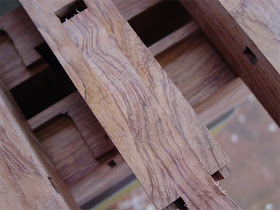
Another few examples of these connections, which also came out satisfactorily:

Here's one half of these batten-draw bar assemblies:

And here is the other half:

Then it was time to switch gears. Back to the legs and the 3-way miters, with twin stub tenons and locking bar. Yep, a bit of a complex joint, taking many steps to work.
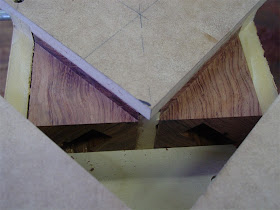
First off I set up the same jig I used last time to cut the folded sword tips on the legs:

This jig allowed me to work two legs at a time.
Here's the same set of legs after the routing on those 45˚ portions away is complete:

Then the legs are drawn out of the jig, flipped over and swapped for one another and I make another pass to do the other abutment.
The result:

Then all four were to the same stage:

Next I needed to remove about 1/4" of material from the upper section of the legs. First I made up some pine blanks to fit in the long trenches. The dummy pieces take the place of the actual draw bars, already made, which are a bit too tight to move easily in and out.
Time to say 'hello' to the Hitachi CB 100 FA re-saw:

One slice on each side of each leg left me this:

Some quick cross-cutting ensued:

And this was the result - the surfaces are still rough from the bandsaw:

Next I modified the same jig from before to allow me to deck down these sections I had just cut:

Target dimension was about 2.505~2.5100", leaving a little over the final dimension of 2.5" for a scrape or three:

All four legs now looking like they should go to a fancy dress ball with their elegant white stripes:

All for today as I've run into the 15 picture line where I tend to cap the writing for a given posting. There will be another post in this series coming your way tomorrow so I' hope you'll tune back then. Thanks for coming by the Carpentry Way. --> on to post 28
Ah, ...the rails move with the thick solid top as it expands and contracts with moisture, very technical, mighty.
ReplyDeleteEvery day is like a long walk along a knife edge - I think it should have been a long walk along a saw blade, but that's just me - :^)
ReplyDeleteGordon,
ReplyDeleteyou're almost seeing it, but that is not entirely correct. These sliding joints are pinned. The sides of the battens are already mortised for the pins. The pins do allow for a certain elasticity at the joints should the table top swell to the point where it starts to to press against the aprons. Remember that the corner joints are meant to restrain the aprons from moving apart from one another.
Zookeeper, Yes perhaps the sawblade analogy might have been a bit more fitting, as I feel at times like the entire process is like jumping from one tiny point to the next. some days are a little more stressful than others of course.
Thanks for your comments!
~Chris