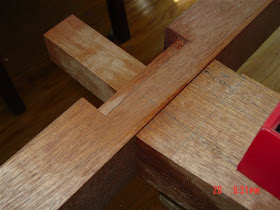
Today's task involves a couple of components. First I set up the main parts of the frame so I could fit the sill piece:

In it goes:

Getting closer:


And seated:

The fit is decent, though I'll need to do a small amount of fine tuning yet. Not a concern at this point in the proceedings.
With the sill in place, I fitted a temporary piece of oak across the gap. This will help support the panels, which are the focus of today's work. Then I measured carefully to establish a line which corresponds to the bottom of the groove in the lower inner frame piece, which is absent from the scene at the moment:

Then out comes the long Shinwa to mark a straight line:

Once I had that lower reference line in place, I located a vertical center line reference and then marked out the spacing of the boards along the piece of oak and at the top of the frame. Then I placed my central panel on the lines and marked the areas with any overlap, having left some of the panels about 1/16" (1 mm) wider than target at the get-go :

I had about 3mm at one side and 1.mm at the other to trim. These excesses of material then fell victim to my Mosaku 54mm:

A while later:

Once the board was trimmed to meet the marks, I crawled underneath and traced the outline of the frame onto the panel:

I repeated the process with the other two panels. When all was done, my next job was to mark a line offset about 1/4" from the traced line on the panel:

The dado in the frame is about 3/8" deep all around, so I have a total of 1/4" (1/8" on each side) of room for the panel to swell, but I really doubt it will move even 1/10th of that.
As I mentioned a couple of posts back, I didn't leave the middle panel with much room to spare for length when I trimmed the end initially:

That was close!
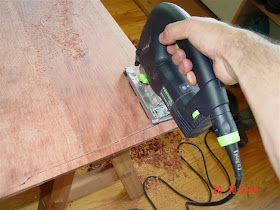
After knifing the cut lines, it was time for a little jigsawing:

When the dust had settled, the three panels were now in their final shapes. I fit them back on as a group to double-check the results:


Next step with those panels is to scrape, plane and finish them (I'll be using Tung oil), however I have a patch to do at the bottom of one of them, so that will be the next order of business.
Thanks for dropping by the Carpentry Way today. I hope you enjoyed the visit and comments are always welcome. --> Onwards to post 22
No comments:
Post a Comment
All comments are moderated. Spamming and comments containing links unrelated to blog content will be deleted.