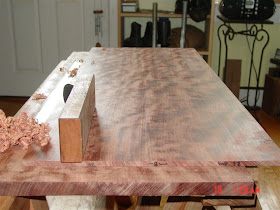
Next steps were all about the panels. Because the seams between panels are covered with the grill bars front and back, there was less need to get a really clean fit between panels prior to glue-up, however, well, I went ahead and tidied the edges up all the same:

The first two panels are now edge jointed and I'm taking a look at the line of abutment:

Next I laid some painters tape along the edges, and glued the first pair together with some yellow glue:

With a good fit, the clamps can be lightly tightened, which is good because a lot of clamp pressure would tend to induce the boards to spring up in the middle.
This process of shooting the edges with the 54mm plane, checking and correcting the fit as necessary, and then gluing up was repeated with the other panels. Here, I'm gluing up the center set, which has three panels attached together, and was done in a 'two-to-make-three' fashion:

A few hours later, the three units were done - in the next photo you can see how I've arranged them together - I think it is looking pretty nice overall and is exactly the 'flickering flame' look I was wanting:

The three panels will not be glued to each other, but I may pin them together at their edges with wooden dowels. I haven't decided yet. Having three separate panels facilitates assembly of the piece - a single panel would be a bit unwieldy and vulnerable to damage. The separations between panels allow for any seasonal movement to be accommodated easily without 5 connected feet of panel being involved at once. That said, given this is edge-grain bubinga, I doubt seasonal movement will be at all significant. It is a very stable material.
Next I trimmed the ends of the panels to get a clean line top and bottom:

And as a final step in today's work, I double-checked the interface between the panels and the frame, using the frame templates, to be sure I hadn't made any grievous errors in measurement or cut out:

All was looking good. Tomorrow I'll assemble the frame and use it to directly trace the outline onto the panels, then mark offsets from that and cut the panels to shape. Then I have some more work to do on the grill bars, and a bit of mortising to do for the bars in the upper and lower frame boards. After that, it will be a matter of doing a bit of fitting for those bars, then processing the main frame pieces to final profile, finish the panels and other parts in oil, and then final assembly. A bit of work remains but the end is vaguely within sight.
Thanks for your visit today. --> go to post 20
No comments:
Post a Comment
All comments are moderated. Spamming and comments containing links unrelated to blog content will be deleted.