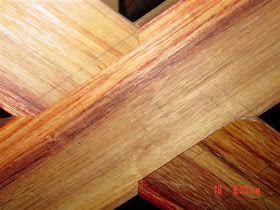
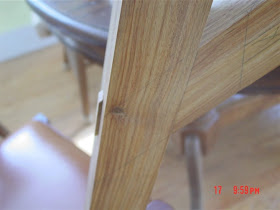
Yesterday I began with an observation by Woodjoint, his apprehension about how this sawhorse would possibly assemble, an apprehension unfortunately borne out by reality when I discovered that the long side braces, when lapped together, could not be inserted as a unit into the top beam.
I did check and re-check to be absolutely certain that there was no way to slide the assemblies together. I then stared for a while longer at the drawing searching for some clue. Well, I've gotten over my denial about all that now - these parts won't fit together and the book is completely misleading in that regard. I was thinking that the drawing might be attempting to show various ways, if taken separately, that the different brace arrangements could be fitted, however there is no getting around the fact that the illustration shows, in both plan, development and perspective views a construction that is in fact impossible, and the text makes no special mention of the minor detail of impossible assembly.
Adding this recent discovery on top of all the other errors I have uncovered in the drawing has been a source of a little disillusionment for me. I have lost some faith in what is shown in the book. The point I find a bit incomprehensible, as someone who is also putting out written works on carpentry layout (the first two volumes of The Art of Japanese Carpentry Drawing are now in publication), is how/why the text could be so messed up. I mean, the material under study is difficult enough as it is without tossing in numerous errors in terms of where lines connect or in showing views of parts with their tenons rotated 90˚ out from where it is supposed to be, or illustrating a part in mirror-image impossibility, but to then show a form of construction which proves impossible to put together seems like something, well, almost malicious. c'est merde.
I couldn't imagine doing that myself - I strive to take what it usually presented in a format that makes it rather difficult to access, to translate it and to explain it in a clear and logically-ordered manner, adding in relevant material from my own experiences in actually making the item. Not that I always want to fill in every line and draw every conclusion for the reader, for that would be a bit of a disservice in its own way, but I could not imagine providing a complex drawing of an item which in the end, after many hours of work on a student's part, would simply not be able to connect together as I had illustrated. It's inconceivable.
Yup, it just makes no sense to me whatsoever, and while from this point forward I will look to Mazerolle for some interesting ideas and will work on improving my understanding of the layout method he presents, I will also place less faith in the work overall and endeavor to adapt it more closely to my own techniques of joinery, my own ideas of proportion and arrangement instead of taking it verbatim. In learning anything, one ought to begin by close emulation of the teacher, however now that I am suspicious of the material, I will veer away from such faithful imitation in the future.
Right then - I have settled upon a course of action to deal with both the long side brace pairs and their associated interior x-brace sets (which have yet to be fitted). I strongly considered re-cutting the brace pairs with some other form of connecting joint than the half laps, however with the mitered half-laps already cut out, I realized that any other form of joint which was developed from that point on would be somewhat weaker than the half-lap. Besides, I had achieved some really clean fits with these second round of brace pairs, and it seemed a shame to change anything:

Here's the other one:

The best solution, I believe, will be to cut the existing tenons on the braces to put them into a 90˚ relation to the beam, and this will allow them to assemble as a unit. This course will necessitate the insertion of a internal patch in the already-cut mortises to function as an abutment for the tenons, and then an additional surface patch to clean up the exit point. I have found that the tenons, when marked out for that 90˚ line, diminish to approximately 0.25" in side at the point where they emerge from the top, which is admittedly a little absurd. with the mortises already cut though, it will be straightforward to fit them.
If I had realized earlier the impossibility of fitting the tenons as the book shows, and had the opportunity to lay the whole thing out from scratch, given the tiny size of the through tenon at the exit point, I would have likely opted to do blind half-length tenons instead, similar to the ones I put on the short side braces (described in previous posts).
So, that's the course of action I will take then - trim the tenons and then patch. The patched holes will not been seen in the end as the beam will have a sacrificial cap fitted, but I will strive to obtain a clean result nonetheless of course. In the meantime, while mentally chewing over the best course of action to take, I have been working on fitting various tenons. Here is one of the long side braces being fit to leg AO:


All the way in:

Then a bit of kerfing on the shoulders:

The resulting fit is 99% of the way there:

Then the through tenon is pared back flush:

Here's the brace that fits to leg DP, the most straightforward to cut and fit of the four brace-end tenons:

Here's the sub-assembly of the long brace pair, fitted to leg AO and DP:

This particular brace assembly shows the Canarywood in all its glory:

On to the brace attaching to leg BN, which, due to the rotation of the leg to the short side plan axis, necessitates a long barbe on the brace:

Another view:

And another view:

I took the opportunity of cleaning up some of the pieces with my plane, with mixed results. Some pieces plane beautifully, while others suffer from a bit of rowed grain and are prone to a little tear-out. I'll probably need to do a bit of scraping here and there.

That's all for now. Today I should complete the fitting of the long side braces to their respective mortises, and them will re-assemble the horse to see how things are shaking out. Once things are looking reasonable, I can proceed to the last structural pieces, namely the interior x-brace sets. Again, what is drawn in the book, using through-tenons, is not going to fly. These I will do instead with blind oblique compound mortises, cutting the tenon to have a 90˚ abutment to the brace, as their overall angle of connection to the long side braces makes a through tenon connection out of the question.
Thanks for dropping by today -- and Woodjoint, if you see anything else leading you to wonder if things will connect up, let me know ASAP. Thanks again.
--> Go to post XXVII
Boy do I feel your pain brother..... I looked the drawings over several times and just couldn't figure how it could be assembled and this is one time I wish I wasn't right. I think your only course is to make this saw horse your own and build it the way that makes sense to you and damn the French...
ReplyDeleteBy the way the work you have completed is fabulous... What superb joinery and the fits are, are, just stunning... This is getting hard to write..... Just beautiful!!!
ReplyDeleteHey Charlie,
ReplyDeletethanks - I'm glad you like the joinery so far and appreciate your kind words.
If I knew then what I know now, I might have made more revisions to the design, especially in regards to the joinery but it seems to be coming out okay, despite the tenon debacle. I've learned a lot on this project. For instance, I now know how to lay out an angled brace to fit against a hip rafter, regardless of what rotation relative to plan, or what slope the hip rafter is at or what the dimensions of the pieces might be. That feels to me like a worthwhile accomplishment.
Now, whether such an inherently stable form as a hipped roof *needs* additional angled bracing is another question and it would be interesting to see an engineering analysis on that. It won't be done by me. I wonder if the French employ the Saint Andre's cross as much for symbolic value as anything else? Is it merely a cultural peccadillo among French carpenters of old?
I'm a bit indifferent as to angled braces anyhow, but it was an area I felt I needed to study a bit more, and the Mazerolle book has provided that opportunity and depth of variation. I'll take a crack at the three-legged bench at some point to study the question of brace rotation. I won't be following the French joinery practice though, and will be very careful to check in future about assembly issues before moving to the cut out stage. In the final analysis, this is 'just' a sawhorse and it served merely as an ideal vehicle for study. Much worse, by far, would have been to make the same mis-cuts in a large roof timber. So, regardless, I am going to be pleased with the outcome here.
~Chris